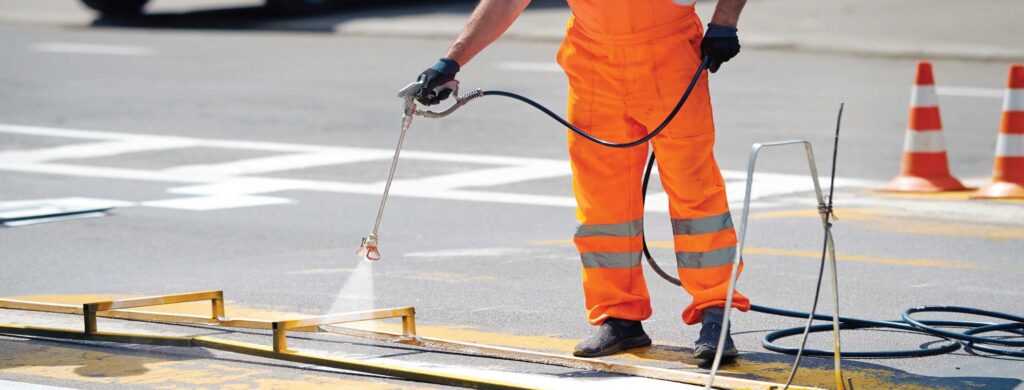
DIY – (Do it yourself) paving solutions offer homeowners a rewarding opportunity to enhance their outdoor spaces while adding value to their property. From creating charming pathways to constructing functional driveways, DIY paving projects can transform ordinary landscapes into inviting and beautiful environments. In this comprehensive guide, we’ll walk you through the step-by-step process of DIY paving solutions, providing valuable insights and tips along the way. Let’s dive in!
Step 1: Planning and Preparation
Before embarking on your DIY paving project, thorough planning and preparation are crucial to its success. Begin by following these steps:
- Assess Your Outdoor Space: Take a close look at the area you intend to pave. Factors such as its current condition, terrain, and any existing landscaping features should be considered.
- Determine the Scope: Define the scope of your project by identifying the specific areas you want to pave. Determine whether you’re working on a small pathway, a patio, or a larger driveway.
- Location, Size, and Shape: Determine the paved area’s location, size, and shape. Consider its integration with the overall landscape design and intended use.
- Sketch a Rough Design: Sketch out a rough design of your paved area, including the layout and arrangement of the paving materials. This will help you visualize the end result and identify any potential challenges.
- Take Accurate Measurements: Measure the dimensions of the area to be paved accurately. This will help you calculate the quantity of materials needed and avoid unnecessary wastage or shortage.
Step 2: Selecting Paving Materials
Choosing the right paving materials is essential for achieving the desired look, durability, and functionality of your project. Here’s what to consider:
- Concrete Pavers: Concrete pavers are versatile and come in various shapes, sizes, and colors. They are durable, easy to install, and suitable for various applications, from pathways to driveways.
- Natural Stone: Natural stone, such as flagstone or granite, adds a timeless and elegant touch to outdoor spaces. It offers unique textures and colors but may require professional installation due to its weight and irregular shapes.
- Brick: Brick pavers add a classic and traditional look to paved areas. They are durable, slip-resistant, and available in various colors and patterns. Brick pavers are suitable for pathways, patios, and driveways.
- Gravel: Gravel is a low-maintenance and cost-effective paving option. It provides excellent drainage and is ideal for informal pathways and patio areas.
5. Interlocking Tiles: Interlocking tiles offer a modern and customizable paving solution. These tiles are available in a variety of materials such as concrete, porcelain, and rubber, and you can easily install them without the need for mortar.
6. Consider Durability and Maintenance: Assess each paving material’s durability and maintenance requirements. Choose materials that can withstand your climate conditions and match your maintenance preferences.
7. Aesthetics and Style: Consider the aesthetic appeal and style of the paving materials. Choose colors, textures, and patterns that complement your home’s architecture and landscaping design.
By carefully considering these factors and selecting the right paving materials for your DIY project, you can create a beautiful and functional outdoor space that enhances the overall appeal and value of your home.
Step 3: Gathering Tools and Supplies for paving
Gathering the necessary tools and supplies is a critical step in preparing for your DIY paving project. Here’s a closer look at what you’ll need:
- Shovel: A sturdy shovel is required for excavating the soil and moving materials such as gravel, sand, and paving stones.
- Wheelbarrow: A wheelbarrow will make it easier to transport heavy materials to the project site, such as gravel and sand.
- Level: A level is essential for ensuring that the surface of your paved area is even and flat. This will help prevent unevenness and potential tripping hazards.
- Rubber Mallet: A rubber mallet is useful for gently tapping paving stones into place without damaging them. It secures the stones in the base material.
5 Tape Measure: Accurate measurements are crucial for determining the dimensions of the paved area and calculating the quantity of materials needed.
6. Gloves: Sturdy work gloves will protect your hands from blisters, cuts, and abrasions while handling rough materials and tools.
7. Additional Supplies: Depending on your chosen paving method, you may need additional supplies such as sand, gravel, and edging materials. Contractors commonly use sand for leveling and filling gaps between paving stones, while gravel serves as a stable base material.
Step 4: Preparing the Site for Paving
Proper preparation of the site sets the foundation for a successful paving project. Here’s how to prepare the site effectively:
- Marking Boundaries: Begin by marking the paved area’s boundaries with stakes, string, or spray paint. Visualizing the layout will ensure that the paved area aligns with your design.
- Excavating the Soil: Using a shovel or excavator, remove the top layer of soil from the marked area to the desired depth. The depth will depend on the type of paving material you’re using, as well as any base layers required for stability.
- Removing Debris: Clear the excavated area of any existing vegetation, roots, rocks, or debris that could interfere with the paving process. This will ensure a clean and level surface for laying the paving materials.
- Leveling the Surface: To check the evenness of the excavated area, use a level and a straightedge. Make any necessary adjustments to ensure that the surface is level and properly graded for drainage.
- Compacting the Soil: Using a compactor or hand tamper, compact the soil evenly throughout the excavated area. Compaction helps create a stable base for the paving materials and prevents them from settling over time.
By gathering the right tools and supplies and properly preparing the site, you’ll set the stage for a successful DIY paving project. Taking the time to complete these steps diligently will ensure that your paved area is sturdy, level, and built to last.
Step 5: Installing the Base for Paving
Creating a sturdy base is essential for the longevity and stability of your DIY paving project. Follow these steps to install the base:
- Choose the Base Material: Decide whether to use crushed gravel or sand as the base material. Gravel provides excellent drainage, while sand offers a smoother surface for laying pavers. Consider the drainage requirements and load-bearing capacity of your project area when selecting the base material.
- Lay the Base Material: Spread a layer of crushed gravel or sand evenly over the excavated area. Use a rake or shovel to distribute the material uniformly, ensuring consistent thickness throughout the base.
- Compact the Base: To thoroughly compact the base material, use a compactor or hand tamper. Compact in layers, working from one end of the project area to the other. Apply even pressure to achieve a firm and stable foundation for the pavers.
- Check for Levelness: Use a level to check the evenness of the compacted base. Make any necessary adjustments to ensure a flat and level surface. Proper leveling will prevent uneven settling of the pavers and ensure a professional-looking finish.
- Determine Base Thickness: Aim for a base thickness of at least 4-6 inches to support the weight of foot traffic or vehicles, depending on the intended use of the paved area. Thicker bases may be required for heavier loads or high-traffic areas.
Step 6: Laying the Pavers
Laying the pavers is the exciting part of your DIY paving project. Follow these steps for a smooth installation process:
- Start from a Corner: Begin laying the pavers from one corner of the project area, working your way outward. This ensures a systematic and orderly installation process.
- Follow the Design Plan: Refer to your design plan or layout sketch to guide the placement of the pavers. Arrange them in the desired pattern, leaving uniform gaps between each paver for jointing material.
- Use a Level: Ensure that the pavers are evenly spaced and aligned. Check periodically as you lay each row of pavers to maintain consistency and accuracy.
- Secure Interlocking Pavers: If interlocking pavers are used, gently tap each paver into place with a rubber mallet. This helps secure the pavers in position and ensures a tight fit between them.
5. Adjust as Needed: Make adjustments as necessary to maintain the desired pattern and alignment of the pavers. Use additional base material, such as sand, to raise or lower individual pavers as needed.
6. Check for uniformity: Periodically step back and inspect the entire paved area for uniformity and alignment. Make any final adjustments before proceeding to the next steps.
By following these steps for installing the base and laying the pavers, you’ll create a solid foundation and achieve a professional-looking finish for your DIY paving project. Take your time and pay attention to detail to ensure a successful and long-lasting outcome.
Step 7: Filling the Joints
Filling the joints between your laid pavers is crucial for stability and longevity. Here’s how to complete this step effectively:
- Choose Jointing Material: Select fine sand or polymeric sand for filling the joints between the pavers. Polymeric sand contains additives that bind together when activated by water, creating a more stable and durable joint.
- Sweep Sand into Joints: Begin by spreading the chosen jointing material over the surface of the paved area. Use a broom to sweep the sand into the joints between the pavers to ensure each joint is adequately filled.
- Remove Excess Material: After filling the joints, use a broom or brush to remove any excess sand from the pavers’ surface of the pavers. This will prevent sand from staining the surface and provide a clean finish to your paved area.
- Compact the Sand: Use a compactor or hand tamper to compact the sand into the joints between the pavers. This helps stabilize the pavers and prevents them from shifting or moving over time. Evenly distribute and compact the sand throughout the paved area.
- Add More Sand if Needed: If the sand settles or sinks below the level of the pavers after compacting, add more sand as necessary to fill any gaps or depressions. Continue compacting until the joints are uniformly filled and level with the pavers’ surface.

Step 8: Finishing Touches
Completing the finishing touches is the final step in your DIY paving project. Follow these steps to add polish and enhance the visual appeal of your paved area:
- Edge Restraints or Borders: Install edge restraints or borders along the perimeter of the paved area to contain the paving materials and prevent spreading or shifting. Choose materials that complement the design and style of your paved area, such as metal, plastic, or concrete edging.
- Landscaping Elements: Enhance the beauty of your paved area by adding landscaping elements such as plants, mulch, or decorative stones. Plant flowers or shrubs along the edges of the paved area to soften the transition between the paved and unpaved areas.
- Mulch or Decorative Stones: Spread mulch or decorative stones around the paved area. Choose mulch or stones in colors and textures that complement the paving materials and enhance the overall aesthetic appeal of your outdoor space.
4. Regular Maintenance: To keep your paved area looking its best, perform regular maintenance tasks such as sweeping, weeding, and reapplying jointing material as needed. Proper maintenance will help preserve the beauty and functionality of your DIY paving project for years to come.
Step 9: Maintenance and Care
Maintaining your DIY paving project is essential to ensuring its long-term durability and aesthetic appeal. Here’s how to effectively care for and maintain your paved area:- Regular Sweeping: Make it a habit to sweep your paved area on a regular basis to remove leaves, dirt, and debris. Use a stiff-bristled broom or a leaf blower to clear the surface and keep it looking clean and tidy.
- Weed Prevention: Prevent weed growth between the joints of your pavers by applying a weed inhibitor or polymeric sand. These products help prevent weeds from taking root and minimize maintenance efforts in the long run.
- Inspect for Damage: Periodically inspect the pavers for signs of damage, such as cracks, chips, or loose stones. Address any issues promptly to prevent further damage and maintain the structural integrity of the paved area.
-
Repair Damaged Pavers
: If you notice any damaged or loose pavers, remove them carefully and replace them with new ones. Use a rubber mallet to gently tap the replacement pavers into place and ensure they are level with the surrounding pavers. - Sealant Application: To protect your pavers from stains, fading, and moisture damage, consider applying a sealant. Sealants help enhance the color and durability of the pavers while providing an additional layer of protection against the elements.
- Joint Refilling: Over time, the jointing material between the pavers may wear away or erode. Periodically inspect the joints and refill them with sand or polymeric sand as needed to maintain stability and prevent shifting or movement of the pavers.
- Address Drainage Issues: Ensure proper drainage around the paved area to prevent water buildup and potential damage to the pavers. Clear any clogged drains or gutters, and ensure that water flows away from the paved area to avoid pooling or erosion.
- Winter Maintenance: In colder climates, take precautions to protect your paved area from freeze-thaw cycles and ice buildup. Use ice melt products sparingly, and avoid using sharp tools or heavy machinery that could damage the pavers.
Enjoy Your DIY Paving Project!
Do-it-yourself paving solutions provide homeowners with a fulfilling chance to elevate their outside areas via imagination and skill. You can have a lovely and practical outdoor space by completing your DIY paving project according to our step-by-step instructions and putting in the time and effort into correct planning, preparation, and execution. Homeowners can realize their outdoor design dreams with the help of DIY paving solutions, whether they’re constructing a beautiful driveway, patio, or pathway. This not only adds value to their properties but also improves their curb appeal. Good luck paving!About the author:
Express Asphalt Solutions, your premium asphalt business in Florida. With the focus on quick, affordable, and top-notch services. We specialize in asphalt paving and repair, sealcoating, as well as parking lot striping. Our skilled team ensures your parking areas are safe, organized and visually appealing. From commercial properties to residential communities, we cater to all your asphalt needs with precision and care. Enhance the functionality and appearance of your parking spaces with our quality solutions. Contact us now for a free quote and experience the different Express Asphalt Solutions can make! See some of our Clients review here"*" indicates required fields


